|
 

100% Made in USA

JDM Design
FI Supports:


| |
The
Elegant and Affordable Audiophile Tweak
Hear what
other people have to say:
"Can I just
say your a genius. My speakers sound a lot better. The highs are of course
lower in volume now, so it now matches the rest of the spectrum. Now the
music doesn't sound muddy at all." - HTF member |
 |
Purpose: Acoustic Panels absorb sound waves from the high frequencies,
to upper bass notes near 80hz (depending on materials, size, and
placement). Panels can also improve imaging by reducing reflected sound
from walls. At a DIY cost of $70 (or less) for four 2'x4' panels these can
be a worthy investment for improving sound in your listening room and/or
home theater.
Test your room by clapping and listening for echoes. If you noticed your
room sounds close to a tiled bathroom then these panels may be for you. |
|
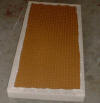
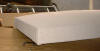
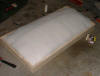
Back View
|
Side View
 |
As for the materials
list, I purchased extra with contingency in mind. (room for error) Below
you fill find the exact numbers for what I used to build 4 panels. In
addition to those materials I used some WIRE, and wood GLUE.
Of course you can build
your own custom versions, and it would be easier to make a 17" wide panel
and not a 24". But, I let Home Depot do the cutting and decided to do this
one without a shop and in my garage. |
Key Benefits
 | Reduce reflections to improve soundstage and stereo imaging |
| Lower ambient room noise to improve clarity |
| Make bright speakers warmer sounding and less fatiguing |
| Reduce slap echoes |
Description
Approx. $16 Per Trap DIY
Quantity: 4 Acoustic Panels to be
placed in key "mirror" reflection locations of the room
Dimensions: 4 feet high, 2 feet
wide, ~4 inches thick with a ~6 inch bulge in the center.
Weight = ~15lbs fully assembled
Color = White Burlap
Flame Retardant = None added
| STORE |
MATERIAL |
Quantity |
Unit |
Cost per Unit |
Total Cost |
| Home Depot |
Fiber Glass Insulation 3.5"
thick. 15" wide by 32' long roll (R-13) |
2 |
EA |
$8.80 |
$17.60 |
| Home Depot |
Standard Peg Board. 8' x 4'
sheet cut into four 4' x 2' sheets at store |
1 |
EA |
$7.98 |
$7.98 |
| Home Depot |
Wood 3/4" thick x 3.5" wide x 8'
long. (cheapest white wood found) |
6 |
EA |
$2.16 |
$12.96 |
| Home Depot |
200 count White Thumb Tacks |
1 |
EA |
$2.63 |
$2.63 |
| Wal-Mart |
Yard of Burlap |
7 |
YD |
$1.48 |
$10.36 |
| Wal-Mart |
Yard of Polyester Batting (48"
wide) |
5.3 |
YD |
$2.27 |
$12.03 |
|
Grand Total |
$63.56 |
Directions:
|
Misc.
Tools used: Hammer, Drill, Tape Measure, Saw, Clamp, and Scissors. (Home
Depot cut the pegboard for free)
 "Hit me baby one more time"
 |
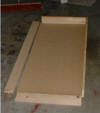 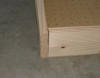 |
Figure 1
I used a hack saw to cut the support beams to match the
pegboard. |
|
1.
Lay down the pegboard fuzzy side up. This is so the poly batting will stick
to the fuzzy side of the board and won't slide around. (Figure 1)
2. Cut the wooden beams so
that the longest length goes all the way to the edges of the pegboard, and
cut the short beams so that they fit on the pegboard.. (Figure 1)
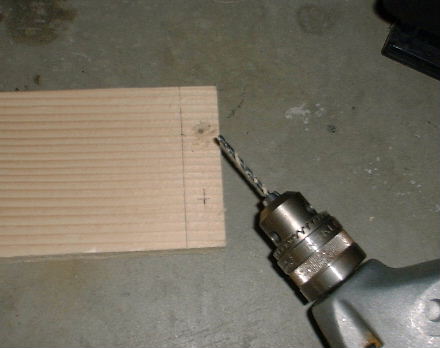
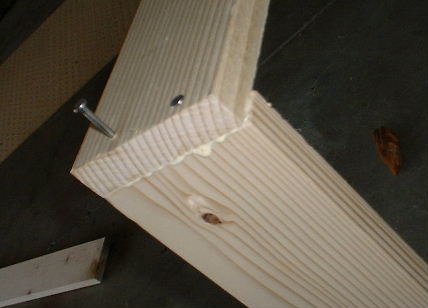
3. Mark and Pre-drill into
the long boards so that you don't split the wood. When gluing, make sure
the marked side gets the glue on it so the nail goes into the other board
centered. There are also other options such as buying some framing brackets
to make a stronger joint. (Figure 2)
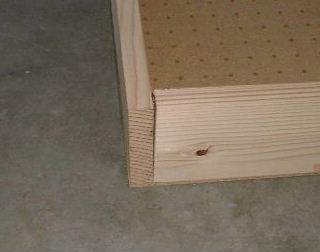
4. Glue and then nail the
frame together. Make sure that the side that meets the pegboard is flat
because cheap boards vary in width slightly due to the rough cuts. I'd
clean up any seeping yellow glue with a wet rag. Another option is to use
screws and finishing washers to secure the pegboard but again, that is a
little more work and money but stronger in the end. (Figure 3)
5. To attach the pegboard
I used yellow glue along with steel wire I twisted and then trimmed. I then
used a hammer to bend the twisted knob down into the panel. (Figure 3)
6. Cut the polyester
batting to length size (about 4 feet) and then I cut the width of it in half
because my batting was about 48" wide. The batting sticks to the fuzzy
pegboard and the insulation will stick to the polybatting. The polyester
also acts as a filter to keep the fiberglass particles in the panel and not
in your room. (Figure 4)
7.
*Remember to use protection when working with fiberglass, I
used a mask, gloves, and goggles. It's not deadly, but can cause some itch.
Then cut a layer of 3/5"
thick insulation and layer it on top of the poly batting. This will only
partially cover the width of the panel so you will need to cut another in
half as seen in (Figure 5). Once you've layer down one 3.5" thick
fiberglass you then layer another 3.5" layer except this time you place it
differently as seen in (Figure 6). Notice how thick the panel seems to be,
make sure you push down on the edges so that they are somewhat inside the
panel. Last, put the left over layer you cut of the poly batting on top of
the panel. You will now have a sandwich which goes: (from bottom to top):
Pegboard, polyester, fiberglass, fiberglass, polyester, (and then burlap).
(See pic 3 in Figure 6, See Diagram for Sandwich)
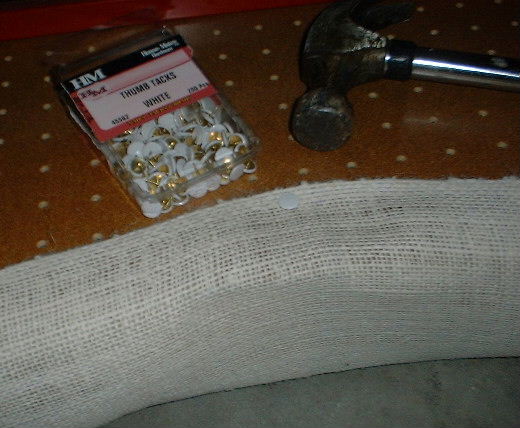
8. Now for my favorite,
part.. the squish and tack. You are going to flip the panel and center it
onto a single burlap sheet which rests on the (clean swept) ground. Then
add a heavy weight on top of the panel as seen in Figure 7.
You will then push down on
the middle so to help squish some more, and tug the burlap on all edges
before tacking to remove any wrinkles. Keep in mind that in my case, the
frame still didn't touch the ground all around because it was pretty
stuffed. When you tack, I pushed in with my finger, and then touched it
with a hammer. It goes into the pegboard nice and strong though I did bend
a few tacks.
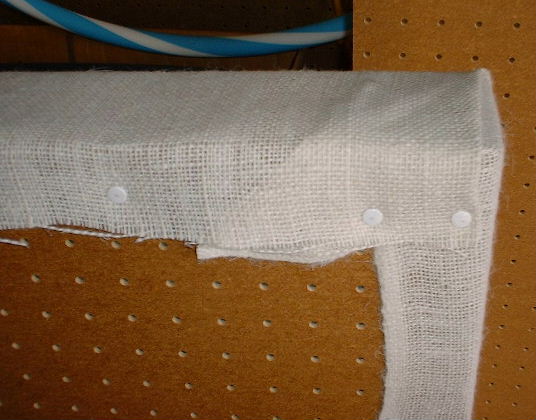
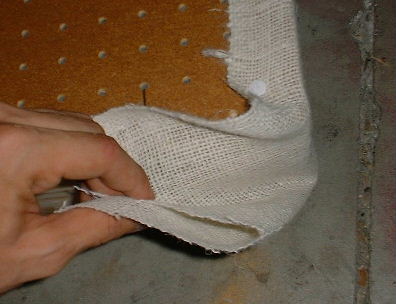
9. My special folding
technique is shown in Figure 9, and you can also see how I tacked. I
started with the middle, and then the ends. After I added an in-between,
and then another in-between.
10. FINISHED... Now that you've seen the hours it took
for the panel you can now enjoy absolute ambient noise suffocation. Just
choose a way to install them by either hanging them using eyelets, or making
legs, or just plain mounting them on the wall. Keep in mind the further you
space them away the better the bass absorption. 3-4" would be plenty,
especially if you plan on building DIY bass traps or helmholtz resonators to
control the bass frequencies. |
|
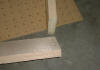  |
Figure 2
I pre-drilled a 7/64" hole for a 1-1/4" nail -- 11ga
(Bright Hoist Hanger) |
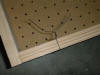 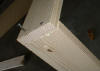 |
Figure 3
I used galvanized steel wire along with yellow glue. |
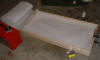 |
Figure 4
Cut poly batting and line bottom. |
|
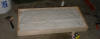 |
Figure 5
Cut Insulation and add the first layer on top of the
polybatting. |
|
|
Figure 6
Add one more fiber glass
layer, and then a layer of polyester batting.
 Diagram
 |
|
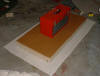 |
Figure 7
Flip onto burlap (approx 5 feet) and then add weight to
squish the insulation down. |
|
|
Figure 8
Stretch and tack, start
with sides, and then top bottom. I tacked middle first and then outer
edges, then the in-betweens.
7 taks on top/bottom, 9 tacks on sides. Out of 200 tacks
that leaves 78 to bend. |
|
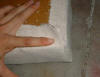 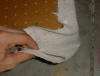 |
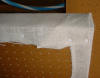
Figure 9
The quick fold and tack shown here. |
|
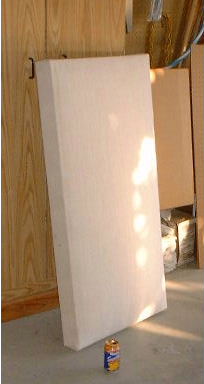
FINISHED
|
Lightly sweep or
vacuum the burlap and you're ready to install them. |
Installation
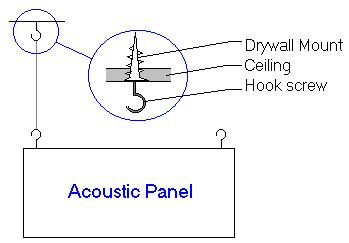 |
I hung the panels 4" spaced from the wall
with wire from the Ceiling using 50lb EZ-Mount Drywall sockets that I first
screwed into the ceiling drywall. Hook screws then went into the ceiling
sockets, and wood frame of the panels. Last, I twisted loops on the ends of
equal length wire and they are now suspended from the ceiling. See Diagragm
on the left. It was about $2 for four drywall mounts at Home Depot and $4
for a box of "Hook" screws. |
The Test and Review
 |
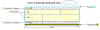
Test 1
In this test I
spaced the acoustic panel 4 inches from the wall and suspended it from the
ground about 2 feet. The speaker and the SPL meter form a perfect 90 degree
angle at the center of the panel as shown.
With no panel at all, the bare wall reflects
just about everything that's sent to it producing 70db of white noise. Then
when I just added the acoustic panel, the reading ended up with an immense
drop of 13db all the way to 57db. To see if my 4" thick foam panel (egg
crate open cell) could do any better I then took measurements with it as a
direct replacement for my panel it and it read 63db which was only a 7db
drop. (Still a lot better than a plain wall) |
Test 2:
This test was the same as
the first except it involved mostly direct sound. The conclusions were
basically the same in that the panel performed better than the very thick
foam, and it certainly made a big difference from using nothing at all.
|
The tests were done
with white noise emanating from a single floor standing loud speaker
(40-20khz resonse). In case you don't know what white noise is, it sounds
like the static noise you get when TV reception is bad. This was all done
in my room which had the other 3 panels already installed to help reduce
some of the unwanted reflected noise that may affect the test.
Conclusion:
The sound stage has often
played a minor role in the enjoyment of music. That is until I discovered a
way to drastically improve upon it with the use of these acoustic panels.
One of the major breakthroughs the panels has caused is an incredible
separation of the music in the soundstage. Rather than having sound coming
from 3 localized points across the horizontal sound stage, the sound now
appears broken up into at least 5 sections where sound can easily be focused
upon. Noises that were once localized at the speaker are now sounding about
a foot closer to the middle. This has not only made the speakers more
transparent but has helped create a better image of wide sources such as the
sound that comes from drum sets.
The second impact the 4
panels have created is the immediately noticeable drop in ambient noise.
Not only does my small room sound much bigger, but it also passes the "clap
test" with flying colors. The room is now the quietest room in the house
which has become very popular with my two dogs who seem to love the comfort
of a room in which they can almost hear a pin drop. Yes there is still a
slight trace of a slap echo, but most of it seems localized high near the
ceiling. Another test I used for evaluating the acoustic change was the
whisper test. I moved from big room, to small room, to my room whispering
loud and soft, exaggerating "s", "sh" and "t" noises. The conclusion I had
was that the new room greatly reduces the amount of high frequency vocals
making my whisper clearer to understand. The bathroom was of course the
worse at this test as the reverb greatly clouded the details in voice.
You can tell from the tests
that these panels greatly perform better than thick open cell foam and can
have a huge impact on the reflected sound. Now just imagine how much 4 of
these panels at the major reflection locations will sound different than the
just the plain walls. The principle is simple in that it reduces reflected
sound from walls therefore making the sound you hear more of the direct
sound that comes from a speaker. It is taking your room a step closer to
anechoic, just without the acoustic suffocation in the mix. Every person
that has listened to "before and after" music in this room has noticed a
difference. Even my 14 year old sister can tell that my room is easily the
"quietest" in the house and music just sounds better. Of course not
everyone's taste for music is alike and there could be people who enjoy the
reflecting sounds of of a specific room. Then there are others who enjoy
diffused sound which would be a more difficult DIY project.
May I mention these have
little to no effect on any bass frequencies below 80hz as the deep test
tones were not affected by a single panel whatsoever.. However, If you end
up building these please email me with your results and include your room
size and number of panels, etc. I will gladly add your quote to this page
in hope of it to help convince people how much acoustic treatments can
really help.
Other popular materials
related to acoustic panels: Compressed Fiberglass, Rock Wool, Sound
deadening board, Polyester, open cell foam, and carpet.
Chris Tsutsui
Oct. 26 2002 |
|